My experience with using crawfish (or cray fish depending where your from) has mixed feelings.
Now I dont for some reason have any pictures of my set up but let me explain my pros and cons about raising Crawfish.
I was doing an experimental set up with a flood and drain system with a small deep well attached.
 not wanting to use any fish because of the cooler temps in NW Arkansas that time of year I decided on local creek cawfish. First lets just note that when catching these quick lil buggers it would help if you had a net. But caught about 20 small to medium crawfish and also a few tadpoles (different story) and one of those bottom sucker fish, and also 3 snails.
I placed all in a small styrofoam cooler without a lid and placed them in the back seat of the truck. That was mistake number one, when I got home, half of the crawfish had escaped and were all over the truck. Took about an hour to find them.
 My patio is inclosed with a pool dug into the ground. I built everything the same level an currently pouring concrete around the pool. Everything is closed in.
Now to the point. Once placing the crawfish in the aquaponics. I built a wire box from old chicken wire so that they can climb on and also cut some pvc to place on the bottom for privacy.
The next day, I discovered 2 crawfish in my pool, now remeber it is cool out, so off I go with snorkle gear and catch the 2 and place them back in the 75 gallon tank.
I thought well that was odd couldnt really see how they could climb out.
Next day same thing, but 4 this time. back with the snorkel gear to chase the crawfish down.
So I watched them for a while noticed that when the water drains from the grow bed and the water table rises that its only 3 inches from the top, so I took out a few gallons until it was 6 inches thinking maybe that would do.
Next morning nothing was in the pool, I was happy, until the next morning, 3 more were in the pool and was on its way. starting to almost enjoy the cold water swim now, but not quite.
I realized then that they were climbing up the folded part of the liner. after a month of all this and modifications I gave up and brought them back to the creek, it was time to use my pool and didnt need them in it.
But to the good part of it all. The natural habitat worked very well. I even dipped up duck weed from a local pond. The water stayed clear and I fed the crawfish fish pellets and they really loved the sweet feed that I still had from when I had a pig. I enjoyed having them and watching the lil habitat work. The plants seem to well too, the basil grew tall and had some cabbage taking off.
I think I would like to do this again but with a tank that has slick sides.
The nutriets from the habitat looked to be balanced even though I never took any test.
So if you see a few crawfish in the creek and have a container that will hold them, do grab some, very beneficial, But if you have a pool close by and they can escape, well its best to just leave them where they are, lol
Oh! and about the tad poles, well they do grow! and it is so awesome to watch them get their legs and
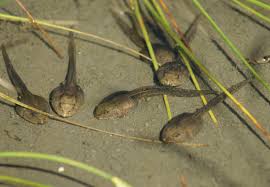 see them change their heads and then next you see them sitting on the side of the tank and jumping, and then..... well then you see them under your lawn furniture are taking a dip in your pool. So maybe not the best idea, but it was fun.
 If you have had any experience of raising craw-fish in aquaponics, please leave a comment, I would like to know how to do it without sharing my swimming pool.
Continue reading
Now I dont for some reason have any pictures of my set up but let me explain my pros and cons about raising Crawfish.
I was doing an experimental set up with a flood and drain system with a small deep well attached.
I placed all in a small styrofoam cooler without a lid and placed them in the back seat of the truck. That was mistake number one, when I got home, half of the crawfish had escaped and were all over the truck. Took about an hour to find them.
Now to the point. Once placing the crawfish in the aquaponics. I built a wire box from old chicken wire so that they can climb on and also cut some pvc to place on the bottom for privacy.
The next day, I discovered 2 crawfish in my pool, now remeber it is cool out, so off I go with snorkle gear and catch the 2 and place them back in the 75 gallon tank.
I thought well that was odd couldnt really see how they could climb out.
Next day same thing, but 4 this time. back with the snorkel gear to chase the crawfish down.
So I watched them for a while noticed that when the water drains from the grow bed and the water table rises that its only 3 inches from the top, so I took out a few gallons until it was 6 inches thinking maybe that would do.
Next morning nothing was in the pool, I was happy, until the next morning, 3 more were in the pool and was on its way. starting to almost enjoy the cold water swim now, but not quite.
I realized then that they were climbing up the folded part of the liner. after a month of all this and modifications I gave up and brought them back to the creek, it was time to use my pool and didnt need them in it.
But to the good part of it all. The natural habitat worked very well. I even dipped up duck weed from a local pond. The water stayed clear and I fed the crawfish fish pellets and they really loved the sweet feed that I still had from when I had a pig. I enjoyed having them and watching the lil habitat work. The plants seem to well too, the basil grew tall and had some cabbage taking off.
I think I would like to do this again but with a tank that has slick sides.
The nutriets from the habitat looked to be balanced even though I never took any test.
So if you see a few crawfish in the creek and have a container that will hold them, do grab some, very beneficial, But if you have a pool close by and they can escape, well its best to just leave them where they are, lol
Oh! and about the tad poles, well they do grow! and it is so awesome to watch them get their legs and

 First I had an old falling down building that I took apart and used what wood I could salvage to build a table. I built it 3 feet deep and 4 feet wide by 3 feet tall. I built it that tall because I wanted to be able to have easy access to the fish, and I measured the 100 gallon stock tank that I want in the future and it was 2 feet.


 The fish tanks is next. I come down about 3 to 4 inches and drill 2 holes that are 1 inch.
 The pump I use is just a simple submersible fountain pump that you can find at Harbor Freight or Big garden centers. The one I found was actually from lowes that was on clearance when the season started to get cold. I use a half inch hose to connect the pump to a half inch pvc that then goes to my bedding trays. You can skip that step and just run the length of hose strait to the bedding tray if you like. But since I plan on putting valves to control the flow later, I chose PVC.
 I am using Lava rock for the first base and then will add expanded clay to the last 3 inches of my bedding trays. I could have went to the creek and got some creek pebbles, but It was just easier to go to the garden center.

 The system was then filled with water and ran for a couple days to make sure the chlorine was out and it was going to work ok before I placed the fish. For testing purposes and it was also going into winter I decided to go with local fish to start and then change them out to Tilapia come spring. You can read how to properly cycle your fish here on the blog if you are wanting to do it correctly.


